Navigating and display are made to be one of the easiest things to learn in picture book. There are many ways to navigate through the collections including using the tool bar, the side panel and the thumbnail panel. The image that is displayed in the main panel is called the current image. In the thumbnail panel the thumbnail view of the current image is highlighted with light blue. (
See Figure 1 for detailed illustration.)
There is a set of four buttons in the middle of the tool Bar.
(See Figure 1)


These buttons can be used to navigate through the collections of image nodes.
When
is pressed the next picture in the list becomes the current image which means that the main panel will display a full view of it and it's thumbnail will be highlighted in the thumbnail panel.
When
is pressed the previous picture becomes the current picture. Use
and
to navigate through sections of images nodes.
A user can navigate through the image collections by clicking on image nodes in the explorer of the side panel. If image nodes are selected with single clicks the image would be only displayed in the properties panel instead of the main panel. (For instruction on opening the properties panel please consult the
Annotation and properties window section of this manual.) If the user chooses the picture nodes by double clicking then the selected picture will become the current picture. The different results of single clicking and double clicking are shown below.
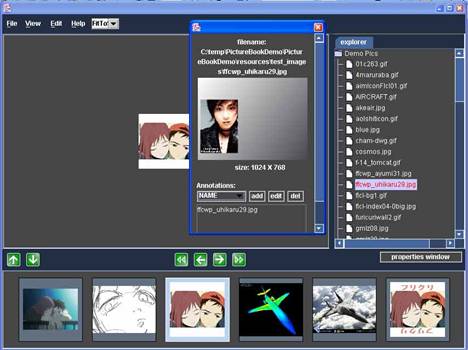
Figure 5 single clicking
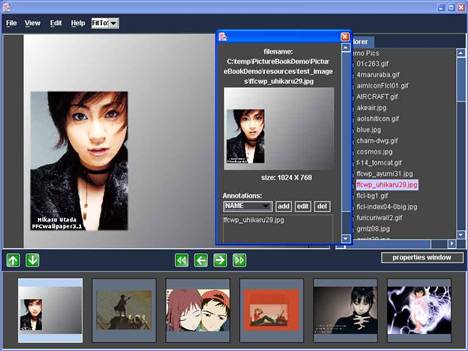
Figure 6 double clicking
The thumbnail panel has limited functions as to navigating the image nodes. It can only navigate within the rage of the visible thumbnails in the panel. Click on the thumbnails to show the images in the main panel.
Collections can be switched by double clicking the image nodes in the explorer. If the picture book is switched to use a collection the tool bar buttons can only navigate through the images nodes of that specific collections. The picture book has to be switched to a collection in order to edit some of its properties. For instructions on editing these properties please consult the
Collection Management section of this manual.
The thumbnail panel can be hidden to give a better perspective of the image in the main panel. Press the

button to hide the thumbnail panel. To undo this change press the

button. Both of the buttons can be found on the left side of the tool bar.
By default, the view of the image in the main panel is resized to fit the dimensions of the panel. This setting can be adjusted by the drop down list to the right of the help menu.
(See Figure 7) Press the arrow button to display a collection of different resizing settings. After selecting the correct setting the picture book will resize the picture accordingly and display it in the main panel. Picture book only supports fixed proportioned resizing.

Figure 7 |
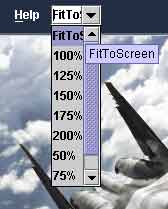
Figure 8 |
Picture book can be changed into Full-Screen or Slide-Show modes by using the
View menu.
Once picture book enters the Full-Screen mode a small exit button will be displayed on the upper-left corner. Click on this button to exit the Full-Screen mode. It takes similar procedure to exit the Slide-Show mode. (See below for detailed illustration)
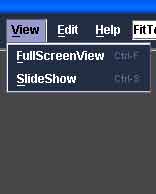
Figure 9 view menu
|

Figure 10 exit button
|