The collections of picture book can be managed by using the explorer and the menus. Image nodes can be removed from and added to any collection. Take note that making these changes will not affect the actual image files that is saved on the hard disk.
The
File menu can be used to add image nodes to a collection. First the user has to navigate to the specific image collection of which the image files are to be added. (For instructions on navigation please consult the
navigation & display section of this manual). Once the correct collection is chosen, click on the
Include File(s) option in the
File menu.
(See figure 2). A file browser will then appear to ask for the specific file(s) of which the user wishes to add. Multiple files can be selected by clicking on the specific files while holding the ALT key. Picture book is also capable of adding a whole directory of image files. In order to include a directory of image files choose the
Include Directory option in the File menu.
(See Figure 2) A file browser that is similar to the include file browser will appear prompting for the specific directory. Note: multiple selections of directories are not allowed. Detailed
illustrations
of the File and directory browsers are shown below.
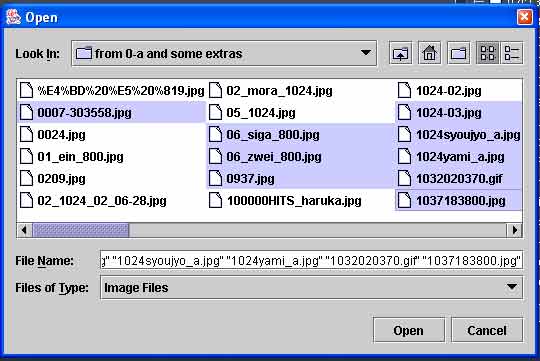
Figure 11 selecting files
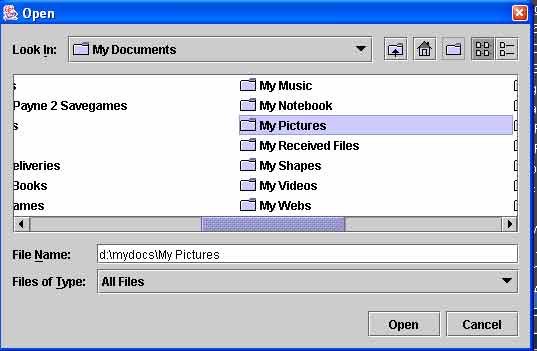
Figure 12 selecting directory
To remove image nodes from a collection, select them first on the side panel. (See
navigation & display section for instruction on selecting images) Multiple selections using the ALT key is allowed. Right click on the image nodes to display the editing options. Note: Mac users would have to use an emulation key for the right mouse click. Select the
Delete from list option to delete the selected image node(s) from the collection. Note: By selecting this option only the image node(s) will be removed form the list. The actual image file will still exist in the hard disk. Detailed illustration of the editing option menu is shown below.

Figure 13
The editing option menu shown in figure 15 can also be used for copying and moving image nodes. To copy an image node, click on the
Copy To... option. A sub menu containing a list of existing collections plus an option to create a new collection with the selected file(s) will be displayed. (See figure 14). Choose the destination where the image nodes are to be copied. If the
[create new collection] option is selected then an option panel with a name filed will appear to prompt for the new collection's name. Note: Collection names must be unique. Moving image nodes takes similar procedures as copying.
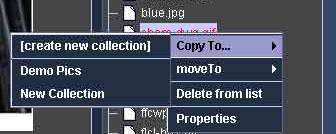
Figure 14
It is fairly easy to remove or rename a collection in picture book. Right click on one of the collection nodes and menu selections will appear as shown below. Select
Unmount Collection to remove the collection from picture book. If
rename Collection is selected an option panel will then appear to prompt for the new name.
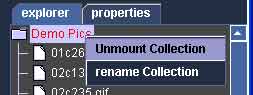
Figure 15